Course Introduction to Programming
Installing the IDE
In this lesson, we will install Visual Studio Code, a modern, lightweight, and highly extensible code editor. It allows you to configure exactly the features you need, turning it into a powerful development tool for C and other languages.
Additionally, we will explore some online IDEs to offer viable alternatives for situations where local installation is not possible, thus ensuring different possibilities for access and development.
⚠️ This lesson is special, as we are updating the course! Previously, the CodeBlocks program was used. You can check the instructions to install it in the video and at the end of the lesson.
Visual Studio Code (VSCode)
Installing Visual Studio Code (VSCode)
- All operating systems:
Go to the official VSCode website and download the appropriate version for your system.
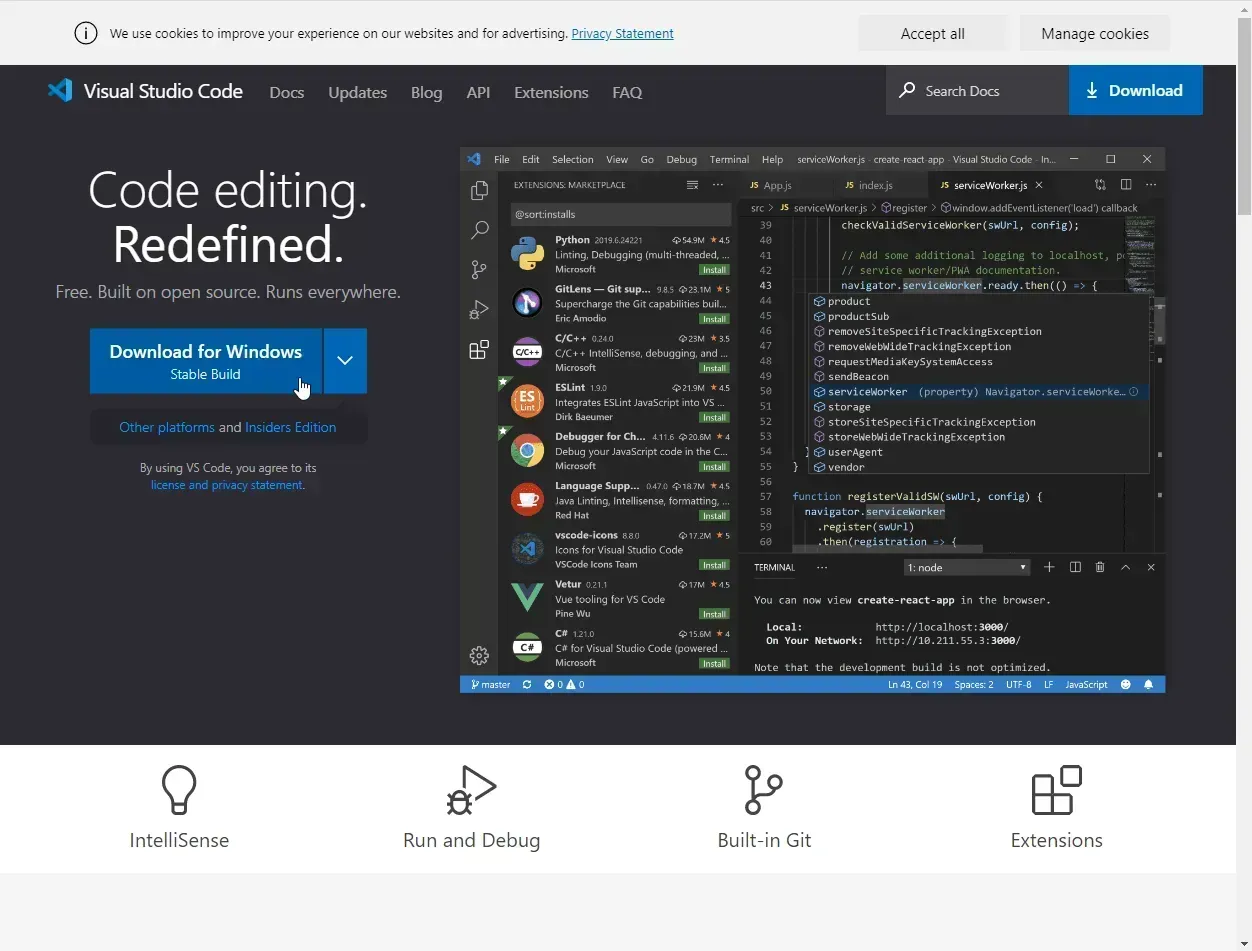
Figure 1 :VSCode Download
Double-click the downloaded file to start the installation.
Check the "Open with Code" options to make it easier to open VSCode directly from a working folder.
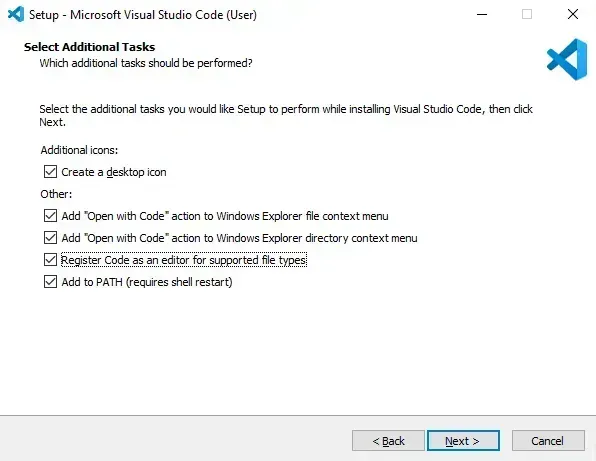
Figure 2 :Options during VSCode installation
After installation, open VSCode. Your layout should look like the image below.
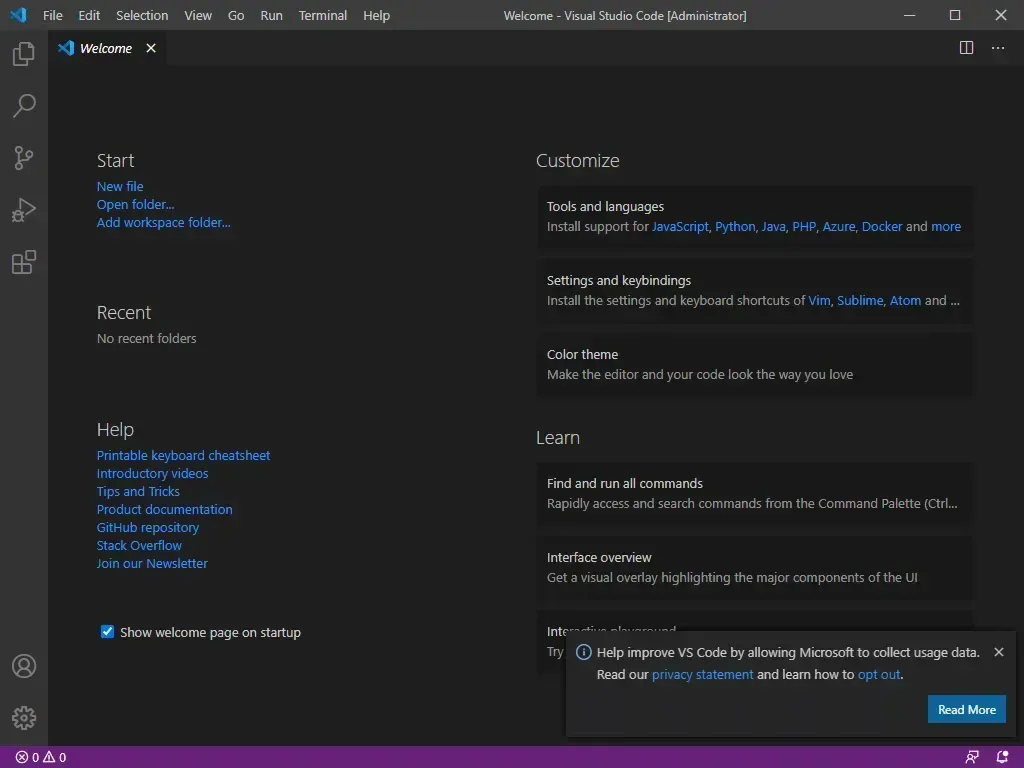
Figure 3 :Initial view of VSCode after installation
Installing the C/C++ extension
In VSCode, we can install extensions that enhance its functionality, allowing you to customize the editor according to your specific needs. The C/C++ extension is particularly important as it provides fundamental features for C development. To install it, follow the steps below:
- Press Ctrl+Shift+X to open the extensions tab
- Search for "C/C++" (official Microsoft extension)
- Click on "Install":

Figure 4 : View of the Extension in the VSCode Marketplace
Installing and configuring MinGW-w64
MinGW-w64 is the compilation tool we will use to compile our C programs. To simplify the process, we will use a .bat file, which is responsible for automatically performing the necessary installation and configuration 😉. To do this:
- Click the button below to download the .bat file to your computer
⚠️ Security Note: Windows might display a warning when you try to run the .bat file. In this case, confirm the execution by clicking “Run anyway” to proceed with the installation.
- After the download, locate the file and right-click on it. Then, select the “Open in Terminal” option.
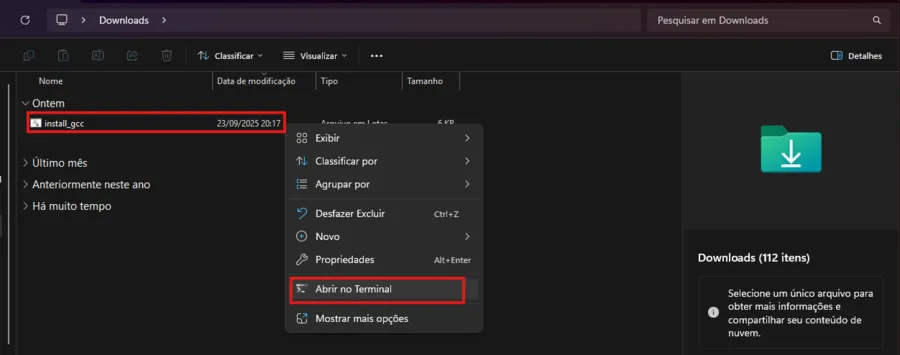
Figure 5 : View of the file and command
- A terminal window similar to the image below will open. Wait until the entire installation and configuration process is complete.
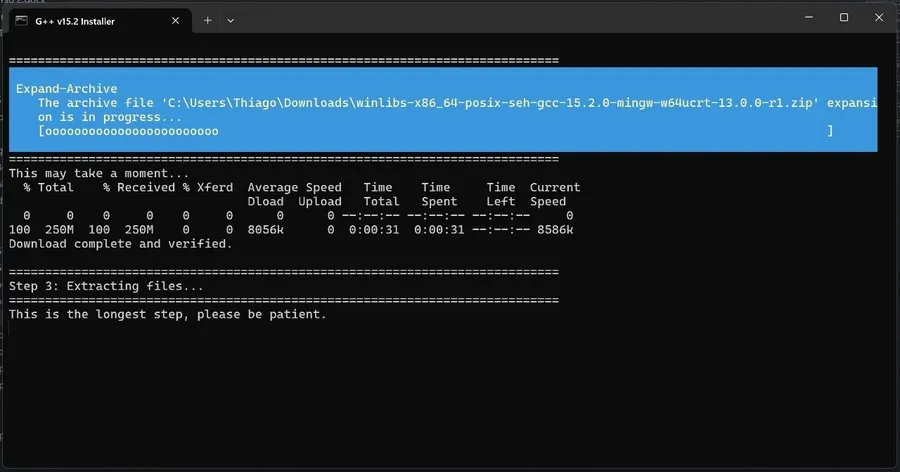
Figure 6 : Terminal screen
- Once it finishes, you can close the terminal.
Check Installation
To check the installation, we need to close the Command Prompt and open it again, so it captures the changes we made to the PATH. Then, run:
gcc --version
Something like this should appear:

Figure 7
If you encounter any errors, please contact us via "Doubts and Suggestions" (top right corner of the site) for assistance!
Installing Code Runner
Finally, install the Code Runner extension, which makes it easier to run code. Follow the steps below:
- Press Ctrl+Shift+X to open the extensions tab
- Search for "Code Runner" (official Microsoft extension)
- Click on "Install":
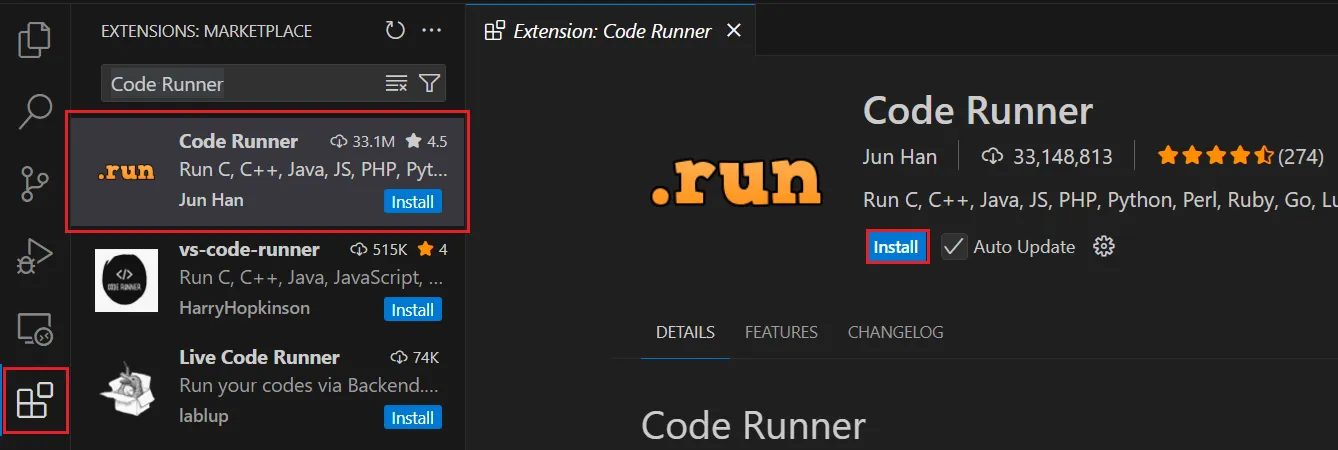
Figure 8 : View of the Extension in the VSCode Marketplace
After installation, access the settings:
- Press Ctrl+, (Ctrl + comma).
- Search for "code runner run in terminal".
- Check the corresponding option:
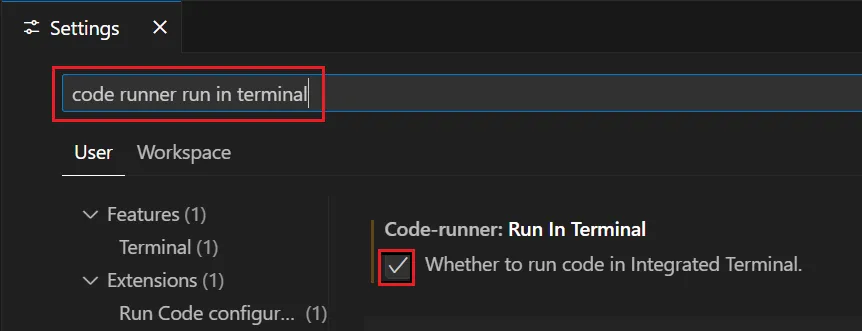
Figure 9 : View of the VSCode Configuration
Online IDEs
For those who cannot install tools directly on their computer, online IDEs emerge as a viable alternative. They allow you to write, compile, and run programs directly from the browser, without the need for local configurations. This way, it is possible to practice programming anywhere and on any device with internet access, ensuring flexibility and continuity in your studies.
However, whenever possible, it is recommended to install an IDE on your own computer, as the performance tends to be superior, the environment is more stable, and you will have greater control over the compilation and execution settings of your programs. 😉
We recommend the following online IDEs:
- GDB online: available in C, C++, Python, Java and many other languages (https://www.onlinegdb.com/)
- Usaco Guide: only available in C++, Java and Python 3.12.3 (https://ide.usaco.guide/)
CodeBlocks Installation
⚠️ This section belongs to the old version of the course. If you do not want to use VSCode, follow the steps below.
What is CodeBlocks?
CodeBlocks is an IDE for programming in several programming languages, including the C language. IDEs are programs that facilitate the coding of programs; IDEs have tools that make programming easier, and they already come with the compiler included.
Installing CodeBlocks.
To download CodeBlocks, access the official CodeBlocks website. You will be redirected to a page like this:
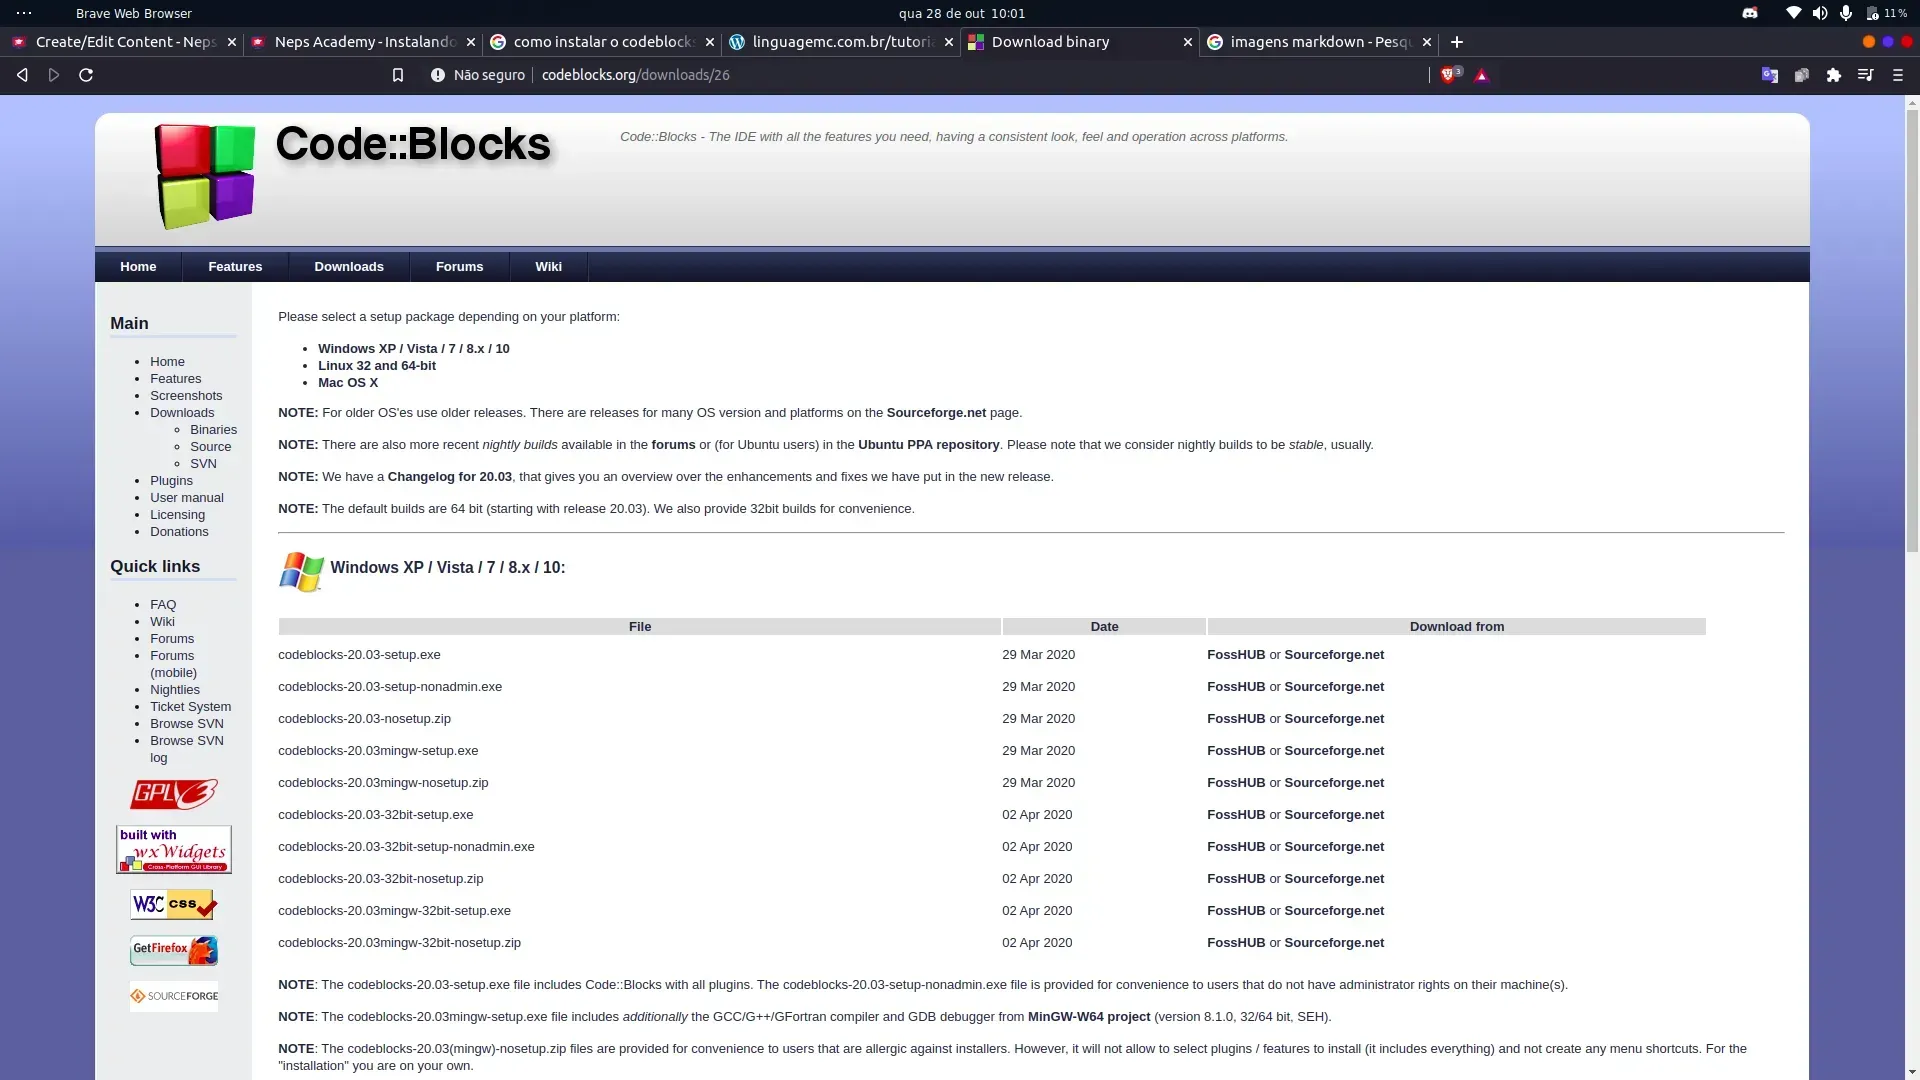
Figure 10
Always click on the option with "mingw-setup", in the case of this tutorial "codeblocks-20.03mingw-setup.exe".

Figure 11
Click on "sourceforge.net" to start the download. After the download is complete, click on the downloaded file to perform the installation.
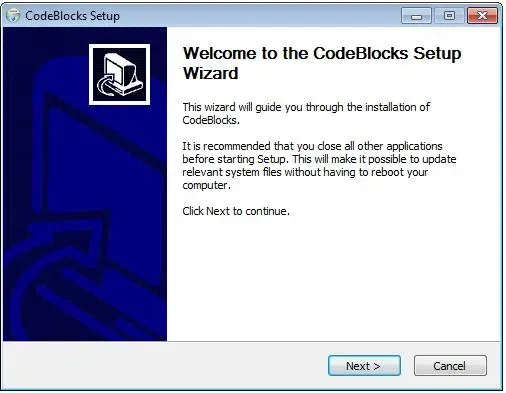
Figure 12
After you have clicked on the installer, a screen like this will open, press Next to continue.
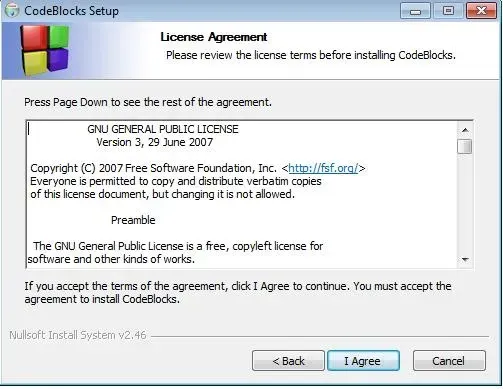
Figure 13
On the license screen, press I Agree to accept and continue.
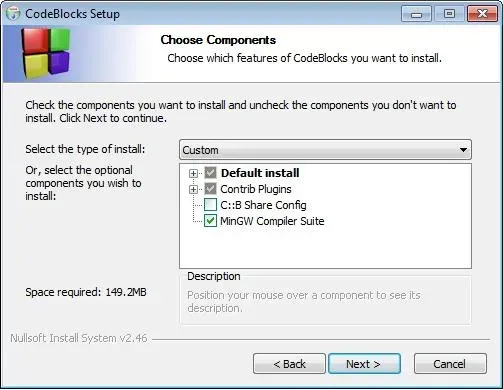
Figure 14
On the Choose Components screen, click Next.

Figure 15
On the Choose Install Location screen, click Install so that the installation can be done. If you want to install CodeBlocks in a specific folder, different from the default one, modify the destination folder field before pressing Install.
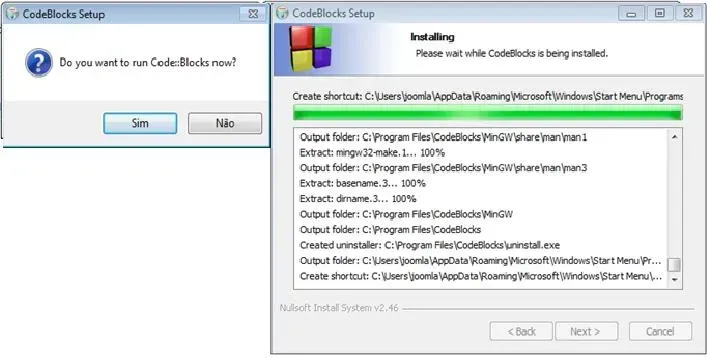
Figure 16
After the installation, a message like this will appear, press Yes to start CodeBlocks
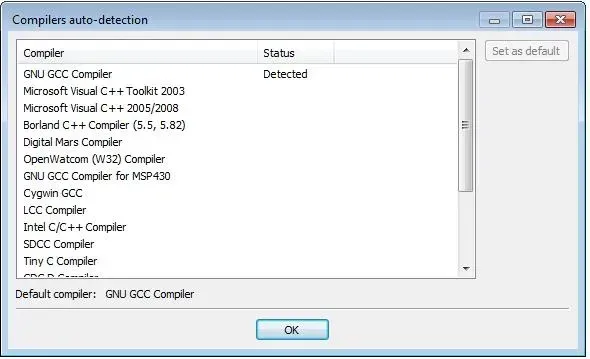
Figure 17
Now verify that the compiler was detected as: Default compiler: GNU GCC Compiler and click Ok

Figure 18
Choose the option "Yes, associate Code::Blocks with C/C++ file types", to link C and C++ files to CodeBlocks and press Ok
Now we are ready to start coding programs in C. 😃
